
Widget builder how to
Use these steps to build, manage, and hand off CMS-configured widgets. For what CMS-configured widgets are and how they work with the SDK, see Widget builder concept.
Open the Widgets tab
To open the Widgets tab:
-
In Arena, go to CMS > Widgets.
The Widgets tab has Created and Archived views.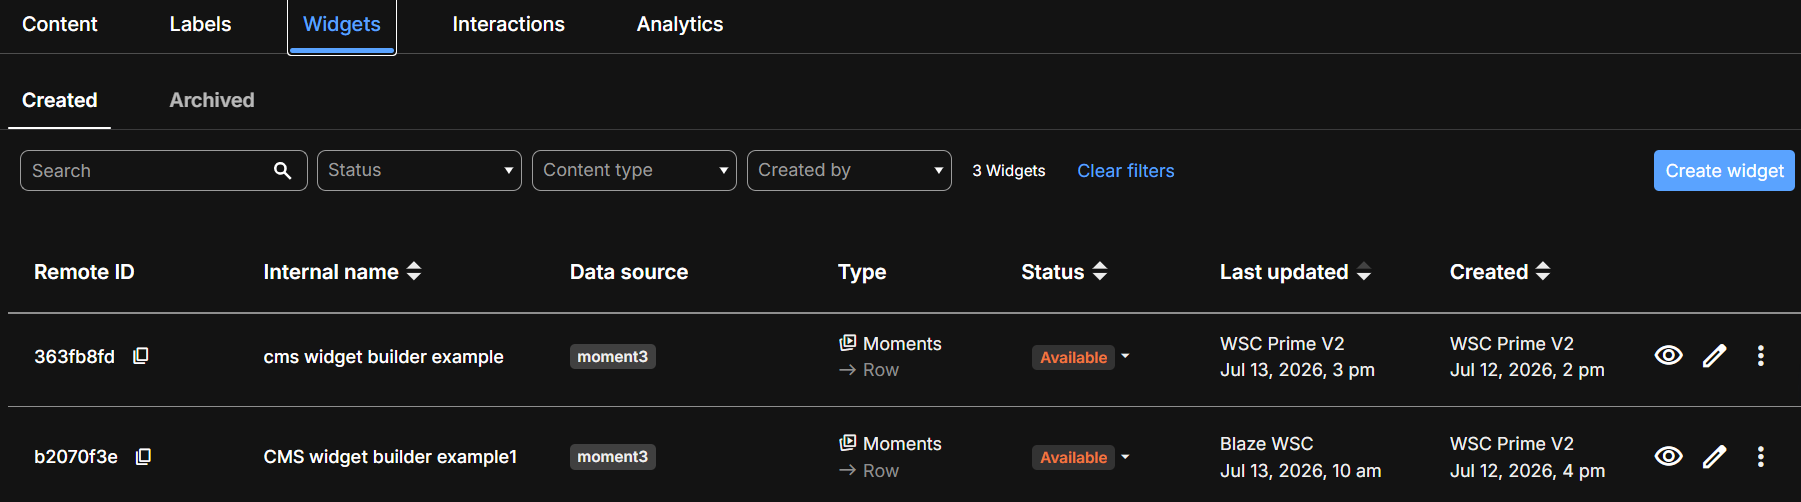
View and manage widgets
Widget list columns
In the Created view, the fields available are listed in the table that follows.
| Column | What it shows |
|---|---|
| Widget remote ID | The CMS-generated ID for the widget configuration. For example, xyz123. This is the ID the developer needs. |
| Internal name | The CMS name that helps you identify the widget. |
| Data source | Labels referenced by the widget. |
| Type | The content type and layout, such as Moments and Row. |
| Status | The status you set for the widget: Available or In use. |
Create a widget
To create a widget:
-
In Arena, go to CMS > Widgets.
-
On the Created tab, select Create widget.
The Create widget screen opens.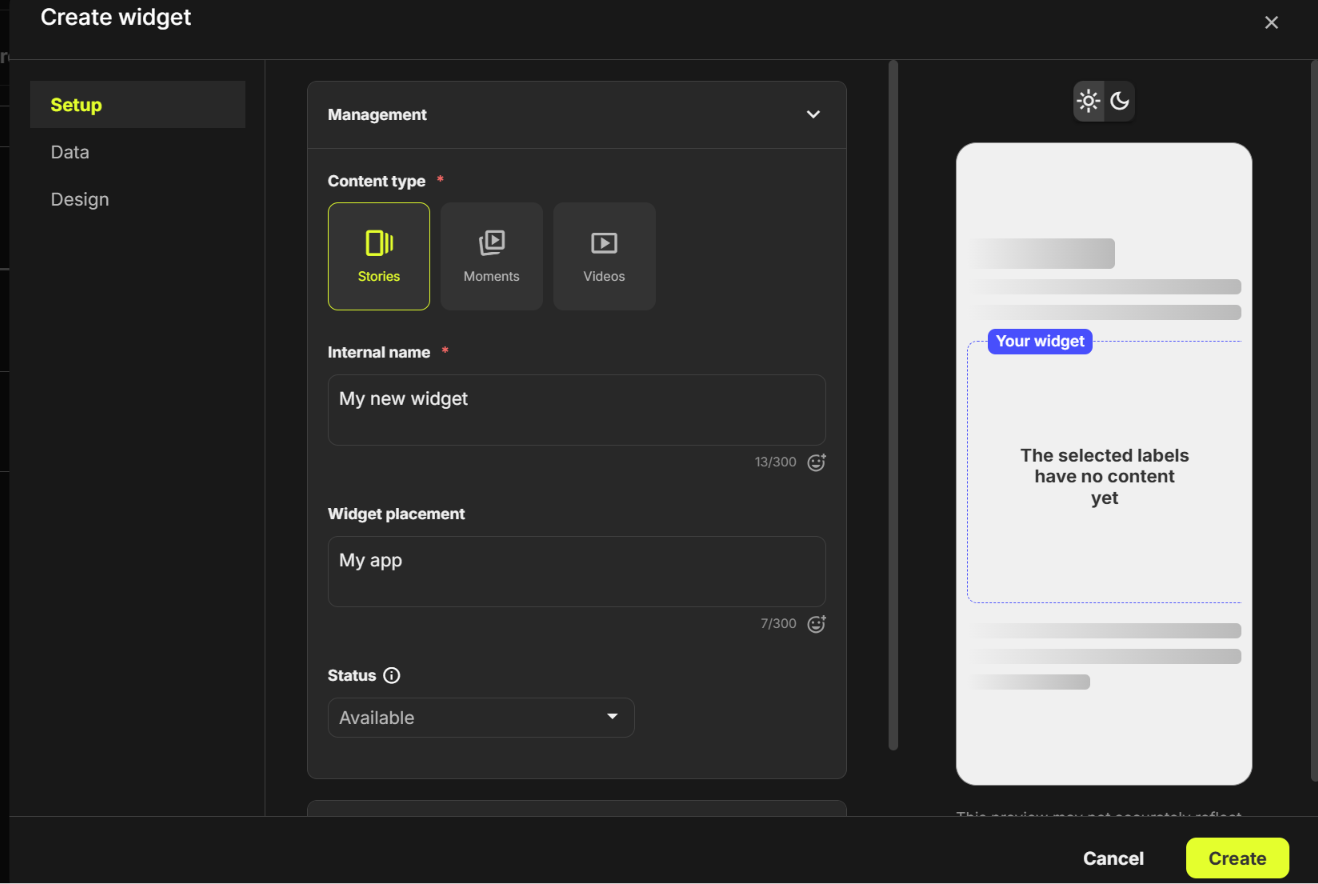
-
Navigate through the Setup, Data, and Design sections to complete widget settings.
-
Select Create.
A widget remote ID is assigned. The developer needs this to deploy the widget in the app.
Setup section
The setup tab has the options listed in the table that follows.
| Area | Option | Description |
|---|---|---|
| Management | Content type |
|
| Management | Internal name | Enter a CMS-only name that helps you identify the widget in the list. |
| Management | Widget placement |
|
| Management | Status | Set the status yourself from the dropdown:
|
| Layout | Type |
|
| Layout | Max items shown | Set how many items the widget displays. |
Data section
On the Data tab, configure how the widget selects and orders content.
| Area | Option | Description |
|---|---|---|
| Data source | Label condition |
|
| Data source | Limit results | Turn on to limit the number of results returned by the data source. |
| Item order | Default order | Choose how items are ordered, such as As set in labels, Newest first, and so on. |
| Item order | Show unread first | Turn on to show unread items before read items. |
Design section
On the Design tab, configure the widget's appearance. Appearance may vary slightly between different operating systems.
| Area | Option | Description |
|---|---|---|
| Widget design | Design type | Choose how your layout is managed:
|
Edit a widget
To edit a widget:
- In Arena, go to CMS > Widgets.
- On the Created tab, find the widget by Internal name or use search and filters.
- Select Edit, then change settings as needed.
- Select Save changes.
CMS updates appear in the app after the widget loads or refreshes data again (for example, through the app's normalreloadDataflow). Tell the developer that CMS edits are not pushed into an already-loaded session.
Related documentation
| Topic | Description |
|---|---|
| Widget builder concept | What CMS-configured widgets are and how they work with the SDK |
| Widgets | Widget types and code-configured vs CMS-configured widgets |
| Labels and scheduling | Labels used in widget data sources |
Updated 3 months ago